 | |
| sciento.co.uk |
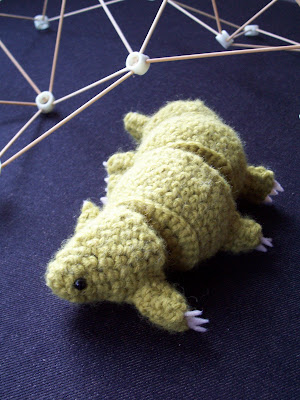
Obviously I have been wanting to crochet these for a long time, but only recently got around to it, encouraged by a request from a great lab from my undergrad alma mater that uses them as a model organism. Here's a pattern so you can do it too.
I had a great time working on these articulated body segments, but they can definitely be optimized. I want to try inserting some rounds of thick craft foam or thin cardboard at the boundaries of each segment, and possibly tether the whole thing together internally, nose to tail, so that the segments remain compressed together. If you try it, let me know how it works!
I'm going to use abbreviations here - I always though they were weird and annoying, but I was forced to learn to use them for a project and now I am hooked on phonics. 'Sc' means to make a single crochet in the next stitch, and along those lines '2sc' means to increase. 'dec' means to make a decrease over the next two stitches using single crochet unless otherwise specified. Brackets denote parts of the pattern that will be repeated, '2x' (twice) or '3x' (three times) and so on.
You will need:
- Worsted weight yarn (pretty sure this is Lion Brand Wool-Ease in Lemongrass)
- Size G hook (my standard for a nice tight gauge)
- Yarn needle
- 2 safety eyes
- Needle and thread to match the yarn
- Felt for the claws
- Stuffing or fabric scraps to use as such
- Slip ring
- Chain
- Single crochet
- Increase
- Decrease
- Importantly, to make the tardigrade look like it has a hard cuticle, you really need to work only in the back loops and then switch to working in only the front loops to form the hard edges at the boundaries of each segment. See this sculptural crochet primer I wrote for a demonstration of this technique.
- Note that this is worked in a spiral like amigurumi.
Body (make 1)
Round # / Instructions / (stitches in that round)
- Make a slip ring. This forms the mouth of the tardigrade.
- Sc 6 in this ring (6) Remember, always work in the back loops only unless specified.
- [sc, 2sc] 3x (9)
- [2sc, sc, sc] (12)
- sc all (12)
- [2sc, sc] 6x (18)
- [sc, sc, 2sc] 6x (24)
- sc all (24)
- sc all (24)
- [dec] 12x in front loops (12) You are almost done with the first segment, so stuff it now and add the safety eyes.
- [sc, dec] 4x (8)
- 2sc all (16)
- 2sc all (32)
- sc all in front loops (32)
- sc all (32)
- sc all (32)
- sc all (32)
- sc all (32)
- sc all (32)
- dec 16x in front loops (16) Stuff this segment.
- dec 8x (8) Repeat rows 12-21 once more.
- 2sc all (16)
- 2sc all (32)
- sc all in front loops (32)
- [sc 6x, dec] 4x (28)
- [dec, sc 5x] 4x (24)
- [sc 4x, dec] 4x (20)
- [dec, sc 3x] 4x (16)
- [sc 2x, dec] 4x (12) Stuff this segment.
- dec 6x (6)
- make two decreases over 3 stitches each, and then finish off.
Round # / Instructions / (stitches in that round)
- Make a chain of 8 stitches (8)
- sc all (8)
- sc all (8)
- sc all (8)
- make one slip stitch and then finish off, leaving a long tail you will use to sew the leg to the body.
Cut 8 pieces of felt that end in claws, sized so that you can tuck them into the openings of the legs. Using the needle and thread, sew them in place, and then use the yarn needle to sew the legs to the body.
THE END. Enjoy!


Comments
Love your work - wish I could knit!